DIY Bushcraft Shelter: How to Build with Natural Materials
Venturing into the wilderness is an exhilarating experience, but mastering the art of building a bushcraft shelter can make the difference between an enjoyable adventure and a challenging ordeal. In this comprehensive guide, we’ll walk you through the process of constructing sturdy, weather-resistant shelters using natural materials found in the wild. Whether you’re a seasoned outdoorsperson or new to bushcraft, these step-by-step instructions, practical tips, and recommendations will equip you to create a shelter that keeps you safe, warm, and dry.
Why Build a Bushcraft Shelter?
Protection from the elements is paramount in any wilderness setting. A well-built bushcraft shelter helps retain body heat, shields you from wind, rain, snow, and insects, and provides psychological comfort essential to survival situations. Beyond safety, constructing a natural shelter deepens your connection with the environment and hones valuable outdoor skills.
Choosing the Perfect Location
Before gathering materials, select a shelter site carefully:
- Avoid low-lying areas prone to flooding.
- Seek natural windbreaks like hillsides, rock outcroppings, or dense bushes.
- Look for proximity to natural resources, such as fallen branches, moss, or thick grasses.
- Ensure access to a safe water source nearby but not so close as to invite insects or flooding.
- Select ground that is dry and clear of large rocks or debris.
- Consider visibility for rescue— too dense vegetation may reduce your chances of being spotted.
Essential Tools and Materials
While bushcraft emphasizes natural materials, having some essential tools will greatly ease your build:
- Knife: For cutting and carving branches.
- Folding Saw or Hand Saw: Helps with larger branches and precision cuts.
- Axe or Hatchet: For chopping wood and preparing a durable frame.
- Rope or Cordage: Useful for securing the frame.
- Gloves: For protecting your hands while handling rough materials.
Product Recommendations:
- Survival Knife: A sturdy fixed blade like the Gerber StrongArm offers versatility in bushcraft tasks.
- Folding Saw: Bahco Laplander is compact and effective.
- Paracord: Lightweight and strong for lashings.
Natural Materials for Building Your Shelter
Utilize the environment to its fullest. Here are common natural materials and their best uses:
| Material | Use in Shelter | Benefits |
|---|---|---|
| Branches and Saplings | Framework and supports | Strong, abundant, shapeable |
| Leaves, Grass, Moss | Insulation and waterproof layering | Natural heat retention and moisture barrier |
| Bark | Roof shingles or siding | Durable, water-resistant outer layer |
| Rocks and Stones | Foundation, fire rings, structural stability | Stable base and heat retainers |
| Reeds and Thatch (if available) | Roofing and wall covering | Excellent waterproofing and insulation |
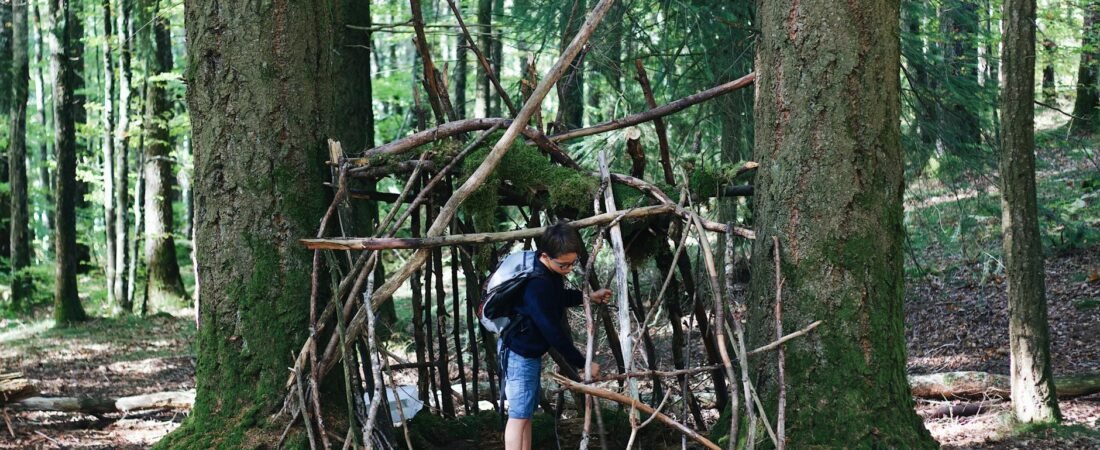
Step-by-Step Instructions to Build Popular Bushcraft Shelters
1. Lean-To Shelter
- Find two sturdy trees spaced 6 to 10 feet apart.
- Cut a strong ridgepole branch measuring 4 to 6 feet long.
- Secure the ridgepole between the two trees, about chest height.
- Lean smaller branches against the ridgepole at a 45-degree angle to form the roof frame.
- Layer leaves, grass, and moss over the branches to create insulation and a waterproof barrier.
- Create a soft bed inside using more grass and leaves.
Tip: Build your lean-to with the open side facing away from prevailing winds to maximize shelter from the elements.
2. Debris Hut Shelter
- Find a strong, straight branch to serve as a ridgepole.
- Form an A-frame by leaning the ridgepole on a tree or forked stump.
- Lean smaller branches on both sides to form ribs.
- Cover the frame with a thick layer of leaves, forest debris, and small branches, overlapping layers to repel water.
- Insulate the inside floor with soft moss or pine boughs.
Benefits: Offers superb insulation and protection from wind, ideal for colder conditions.
Warning: Regular maintenance is necessary as debris settles over time, and natural materials may attract insects.
3. Wigwam Style Shelter
- Bend flexible saplings into a circular frame, roughly 6–8 feet in diameter.
- Tie the tops together securely with cordage or natural vines.
- Cover the frame with large sheets of bark or a thick layer of grass for waterproofing.
- Create a small firepit in the center with proper ventilation and a smoke vent.
Note: The wigwam design provides excellent weather protection and ventilation.
4. Snow Cave Shelter (For Winter Conditions)
- Mound snow into a large pile and let it settle and harden.
- Carefully hollow out an interior space with an entrance tunnel.
- Insulate the floor with pine boughs or leaves to prevent heat loss.
Important: Ensure adequate ventilation to avoid carbon monoxide buildup.
Tips for Insulating and Heating Your Shelter
- Use thick layers of natural debris (leaves, moss, grass) for insulation.
- Build a fire reflector wall using rocks or logs to direct heat towards your shelter.
- Position your fire offset from the entrance, about 4 to 6 feet away, to maintain safety and heat.
- Create a snug sleeping area to conserve body heat but allow comfortable movement.
- Seal gaps with moss or lichen to prevent drafts.
Common Questions About Bushcraft Shelter Building
What if I don’t have any tools?
You can still use natural formations like fallen trees or caves for shelter. However, carrying even a basic knife greatly simplifies cutting and assembling materials.
How do I make my shelter waterproof?
Layer materials from the bottom upward so water sheds off the shelter. Use bark or thick grass on the outside and densely pack leaves and moss for insulation inside.
How long does it take to build a shelter?
Time varies based on materials and design. A lean-to shelter can be constructed in 1-2 hours, while a debris hut may require several hours.
Can I build shelters in all environments?
Yes, but adapt your materials and techniques based on what nature offers. For example, reeds and grasses are ideal in wetlands, while snow caves suit winter landscapes.
Additional Resources for Mastering Bushcraft Shelters
- “Bushcraft 101” by Dave Canterbury – An essential book on survival skills.
- The Ultimate Bushcraft Survival Manual – Offers detailed shelter-building chapters.
- Local wilderness workshops – Hands-on experience with experts can fast-track your skills.
Final Thoughts
Building a bushcraft shelter from natural materials is both a rewarding and essential wilderness skill. With some preparation, the right tools, and knowledge of your environment, you can create a safe haven that turns a challenging outdoor experience into a memorable adventure. Remember, safety comes first—choose your location wisely, build methodically, and never compromise on shelter stability and ventilation.
Ready to elevate your bushcraft skills? Equip yourself with quality tools and get hands-on practice in your local woods this weekend. Your next adventure could depend on the skills you develop today!
Credits
Photo by Maël BALLAND on Pexels. View the original image here.